
ELEGOO 0.96 Inch OLED Display Screen Module
4.6Editor score
Self-luminous pixels
128×64 graphics
Includes jumper wires
This guide compares the top Arduino LCD Display modules including OLED, TFT, and character screens for makers and engineers building embedded visual interfaces.
Choosing the right display is crucial for any embedded project. An Arduino LCD Display provides clear visual feedback for sensors, menus, and status indicators. Whether you need simple text or vibrant graphics, selecting the correct module ensures your project looks professional and functions reliably.
We evaluated ten leading options based on resolution, interface type, and ease of integration. Our comparison covers character screens, OLED modules, and color TFTs. Each product was assessed for compatibility with common boards and the quality of available documentation and support resources.
Each pick highlights key strengths and potential trade-offs for your specific use case. You will find detailed reviews and a side-by-side comparison to help you decide. Please note that availability and pricing can change over time, so check the current links before purchasing.
4.6Editor score

4.5Editor score

4.7Editor score
The following table provides a quick side-by-side overview of the ten selected modules. Compare their display types, resolutions, and connection methods to find the best fit for your hardware constraints and visual requirements.




This module offers a reliable solution for displaying text and basic data on your projects. With a 4.5 star rating, it stands out for its ease of use and consistent performance across different environments. The I2C interface significantly reduces wiring complexity compared to traditional parallel interfaces.
We may earn a commission when you buy through this link, at no additional cost to you.
The built-in potentiometer allows you to fine-tune the backlight and contrast for better visibility in various lighting conditions. It supports 5V power and uses a standard 0x27 address, making it straightforward to integrate with Arduino and Raspberry Pi boards. This makes it ideal for monitoring sensors or showing simple status messages.
While the display is limited to two lines of sixteen characters, this constraint is often acceptable for simple interfaces. The lack of color or graphics might be a limitation for advanced projects, but for text-based readouts, it performs exceptionally well. The included modules ensure you have backups for testing.
If you need a straightforward text display for IoT or school projects, this is a top recommendation. It balances cost, performance, and compatibility effectively. Ensure your code supports the I2C library for smooth operation and take advantage of the adjustable backlight for optimal readability.
Using I2C means you only need four connections, saving valuable pins on your microcontroller for other sensors or components.
The onboard potentiometer lets you adjust the screen brightness and contrast to suit your specific project environment.
We may earn a commission when you buy through this link, at no additional cost to you.
This OLED module provides sharp graphics and high contrast for a low price point. Rated 4.6 stars, it is popular among makers for its brightness and clarity even in daylight. The self-luminous nature means no backlight is needed, which can improve battery life in portable devices.
We may earn a commission when you buy through this link, at no additional cost to you.
The fixed yellow and blue zones help organize information visually without requiring complex code for color management. It connects via four-wire I2C, which simplifies hardware design. You get three modules in the pack, which is excellent for building multiple sensors or keeping spares for prototyping.
One trade-off is the fixed color scheme, which limits artistic flexibility compared to RGB OLEDs. Additionally, it does not support touch input, so you will need external buttons for interaction. However, for displaying metrics, icons, and menus, it is highly effective and easy to implement.
Ideal for robotics or sensor dashboards where clarity is paramount, this module delivers great value. The included jumper wires help you get started quickly. Verify logic levels before powering to ensure compatibility with your specific microcontroller voltage requirements.
OLED technology offers deep blacks and bright pixels, making text and icons stand out clearly against the background.
With three units and jumper wires included, you can test different setups without needing extra parts immediately.
We may earn a commission when you buy through this link, at no additional cost to you.
This module stands out with its IPS panel and high resolution for a compact form factor. Rated 4.7 stars, it offers stunning image quality suitable for complex interfaces and data visualization. The vibrant colors and wide viewing angles make it ideal for handheld devices or kiosks.
We may earn a commission when you buy through this link, at no additional cost to you.
The ST7789V controller communicates via SPI, which is efficient for fast screen updates. It supports both 3.3V and 5V logic levels, ensuring compatibility with a wide range of development boards. The backlight ensures visibility even in dim lighting conditions, which is crucial for indoor or outdoor use.
While the SPI interface uses more pins than I2C, the performance gain is worth it for graphical applications. You should ensure your code handles graphics libraries properly to take full advantage of the resolution. The packaging includes two units, allowing for redundancy or side-by-side testing.
If you need a professional-looking interface for robotics or dashboards, this is the top choice. It balances size and capability exceptionally well. Make sure your microcontroller has enough memory to handle the graphics buffers required for such high-resolution output.
The IPS technology ensures colors remain accurate and bright from almost any viewing angle.
Support for both 3.3V and 5V logic makes it easy to integrate with various modern microcontrollers.
We may earn a commission when you buy through this link, at no additional cost to you.
This TFT shield offers a graphical interface with touch capabilities for interactive projects. With a 4.4 star rating, it provides a good balance of features for creating user interfaces on Arduino boards. The shield format simplifies connection, as it stacks directly onto standard headers.
We may earn a commission when you buy through this link, at no additional cost to you.
The resistive touch input allows for buttons and menus, though it requires a bit more pressure than capacitive screens. The onboard microSD slot lets you store images or data files directly, which is useful for data logging or displaying saved content. The included stylus helps with precise input.
One consideration is that the parallel interface uses more pins than serial interfaces, which might limit other components. Also, resistive touch can wear out faster than capacitive types under heavy use. However, for prototyping interactive screens, it is a robust and straightforward solution.
Best for projects needing menus or data entry, this shield covers most basic needs. Ensure your board has enough free pins for the parallel interface. The tutorial CD included offers guidance, though online resources are often more up-to-date for specific code examples.
Touch functionality lets users interact directly with the screen to control settings or view data.
The card slot allows you to save large files or logs without needing external memory modules.
We may earn a commission when you buy through this link, at no additional cost to you.
This pack provides two modules, which is excellent for projects requiring multiple displays or backups. Rated 4.6 stars, these modules are known for their reliability and clear text output. The I2C interface reduces wiring significantly, making assembly cleaner and faster for DIY makers.
We may earn a commission when you buy through this link, at no additional cost to you.
The blue backlight offers high contrast for reading text in various lighting conditions. You can adjust the contrast using the onboard potentiometer to suit your needs. They are designed to be compatible with a wide range of boards including Arduino and Raspberry Pi, ensuring flexibility in your hardware choices.
While it is a character-only display, it suffices for many standard applications like showing temperature or status codes. The limitation to 16×2 means complex graphics are not possible, but for straightforward data readouts, it is effective. The 5V power requirement is standard for most hobbyist boards.
Choose this if you need multiple screens or spares for a classroom or workshop setting. The quality is consistent, and setup is straightforward. Ensure your code addresses the correct I2C address and initializes the library correctly to avoid display issues.
Getting two units allows you to build multi-panel dashboards or replace faulty modules without delay.
Support for common boards means you can use these with almost any microcontroller project you have.
We may earn a commission when you buy through this link, at no additional cost to you.
This module features a newer design with an integrated conversion circuit that enhances stability. With a 4.4 star rating, it simplifies the transition from parallel to serial interfaces. The inclusion of code examples helps you start quickly without searching for external documentation online.
We may earn a commission when you buy through this link, at no additional cost to you.
The I2C interface saves significant ports compared to parallel options, which is valuable for complex projects. It is compatible with many mainstream controllers, ensuring you can use it across different systems. The two-pack format provides flexibility for testing or multi-screen applications.
One detail to note is that the tutorial is available via a link on the box rather than paper, so you need internet access to download it. The display remains a standard character screen, so advanced graphics are not supported. However, for stable text display, it performs well.
Best for makers who want a stable, easy-to-program module with documentation support. Ensure you check the link on the box for the latest code examples. This model is a strong choice for reducing wiring complexity while maintaining reliability.
The onboard conversion circuit ensures stable communication without external components.
Pre-written examples speed up development and help you understand how to initialize the display.
We may earn a commission when you buy through this link, at no additional cost to you.
This module is known for its ease of use and minimal wiring requirements. Rated 4.6 stars, it is a favorite for beginners due to its straightforward setup. The library provided simplifies coding, allowing you to call functions directly without complex initialization steps.
We may earn a commission when you buy through this link, at no additional cost to you.
With just four connections needed, it frees up GPIO pins for other components in your circuit. The potentiometer allows you to adjust contrast and backlight, ensuring readability in different environments. The 5V power supply is standard and matches most microcontroller boards.
While it is limited to character output, it excels at displaying sensor data or system status efficiently. You must ensure you use the correct I2C address to avoid communication issues. It is robust and reliable for daily use in educational or hobby projects.
If simplicity is your priority, this is a great option to get started quickly. Check the library compatibility with your IDE. It is a solid choice for learning how to interface displays with microcontrollers.
The provided library lets you focus on logic rather than low-level driver details.
Only four wires are required, keeping your breadboard tidy and reducing clutter.
We may earn a commission when you buy through this link, at no additional cost to you.
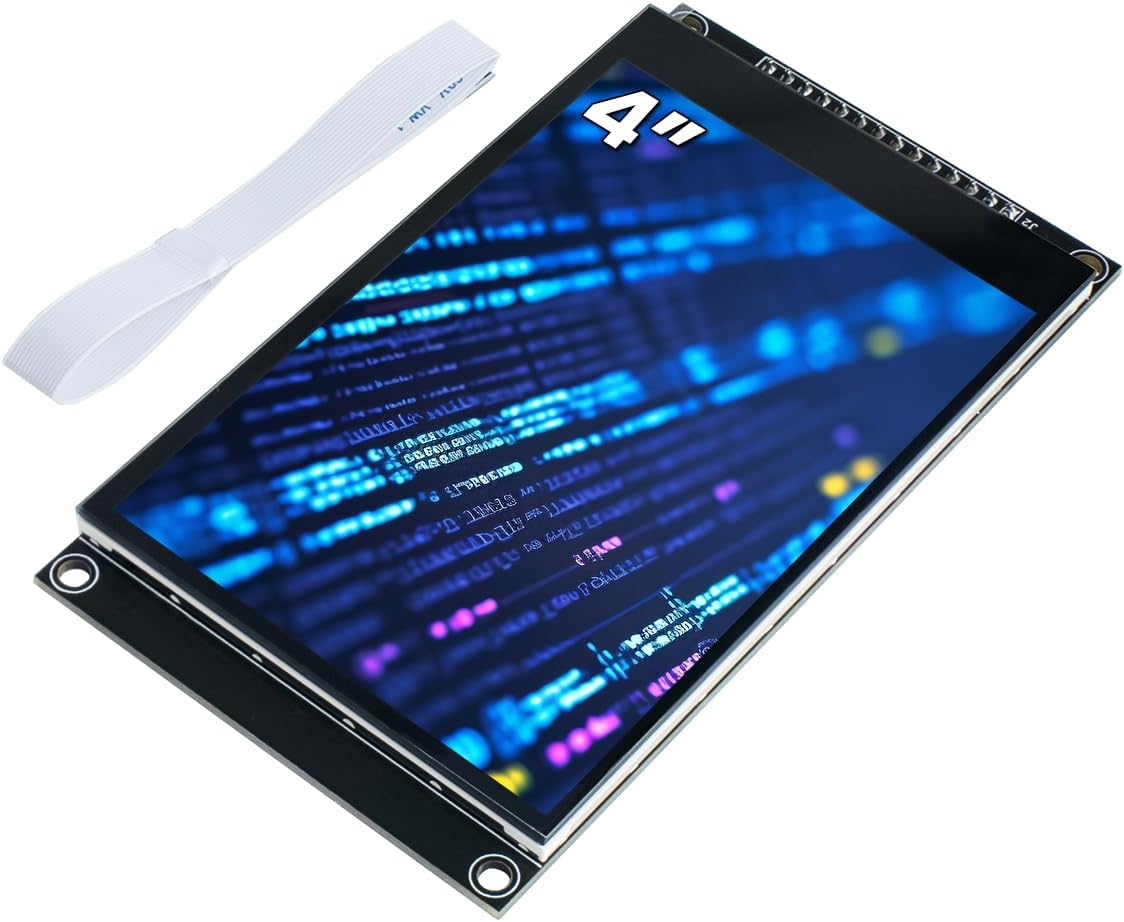
This large touchscreen provides a substantial visual area for complex interfaces. Rated 3.9 stars, it offers high resolution and capacitive touch, which is more responsive than resistive options. The capacitive panel is more accurate and convenient for modern user interaction needs.
We may earn a commission when you buy through this link, at no additional cost to you.
It supports SPI serial bus communication, which helps save I/O pins on your microcontroller. The module includes a TF card slot for storage expansion, allowing you to save images or logs. It is compatible with 5V and 3.3V MCUs, giving flexibility in hardware choices.
While the resolution is high, the software setup can be complex for beginners. The rating suggests some users have faced challenges with drivers or setup. However, for projects needing a large interactive screen, the hardware capabilities are impressive and useful for dashboards.
Choose this if you need a large, modern touch interface. Be prepared to spend time on setup and driver integration. It is suitable for advanced users looking to build handheld electronics or data monitors.
Touch sensitivity is better than resistive panels, improving the user experience significantly.
The TF card slot allows for storing larger assets or logging data directly to the module.
We may earn a commission when you buy through this link, at no additional cost to you.
This pack includes five OLED modules, offering excellent value for workshops or bulk projects. Rated 4.6 stars, these screens are known for their bright, clear dots and low power consumption. The self-luminous nature eliminates the need for backlights, enhancing visibility.
We may earn a commission when you buy through this link, at no additional cost to you.
The high contrast makes small fonts easy to read even in low light. They use I2C interface, saving two I/O ports on your controller. The wide viewing angle ensures the display is visible from almost any direction, which is useful for kiosks or handhelds.
Users need to create fonts via software since none are embedded in the controller, which requires an extra step. The fixed colors limit customization but provide consistent output. This is ideal for projects needing multiple small screens or spares for production.
Ideal for prototyping multiple devices or teaching groups. Ensure you have the necessary tools to generate fonts. The quality is high, making it a reliable choice for embedded visual feedback.
Low power draw during operation makes it perfect for battery-powered portable devices.
Five units allow you to build multi-device systems without buying individually.
We may earn a commission when you buy through this link, at no additional cost to you.
This module offers a compact size with a high-resolution IPS panel. Rated 4.3 stars, it delivers crisp images in a small footprint suitable for wearable or handheld projects. The SPI interface minimizes GPIO usage, making it easier to integrate with limited pin counts.
We may earn a commission when you buy through this link, at no additional cost to you.
The resolution allows for detailed graphics and text, while the IPS panel ensures wide viewing angles. You must ensure voltage consistency between your supply and logic levels to avoid damage. The display uses LED backlighting to ensure visibility in various lighting conditions.
One consideration is the need to check power supply voltage before connecting. The compact dimensions make it ideal for tight enclosures. It supports RGB color, providing a better visual experience than monochrome screens for rich interfaces.
Best for mini dashboards or portable electronics where space is tight. Verify voltage compatibility before powering. This module balances size and visual quality effectively for advanced small projects.
The small footprint allows integration into tight spaces like wearable devices.
IPS technology provides vibrant colors and clear images from any viewing angle.
We may earn a commission when you buy through this link, at no additional cost to you.
Selecting the right display involves evaluating resolution, interface, and power needs. This section breaks down the key factors to help you make an informed decision.
Character displays like 1602 show text only, while OLEDs and TFTs offer graphics. Higher resolution allows for more detailed icons and menus but requires more processing power. Consider what information you need to show.
Choose character screens for simple data, and graphical modules for complex interfaces.
I2C uses few pins, making it easy to wire multiple devices. SPI offers faster update rates, which is better for graphics. Parallel interfaces need more pins and wiring. Match the interface to your board's available resources.
Prefer I2C for saving pins, or SPI for better performance.
Most displays run on 5V, but some support 3.3V logic. Ensure your power source can handle the load without flickering. Low power modules are better for battery projects. Check the specs for current draw.
Verify voltage levels match your controller to prevent damage.
Smaller modules like 0.96 inch fit compact enclosures. Larger 4-inch screens offer better readability. Consider how the display fits your project case. Physical dimensions impact usability and mounting options.
Pick a size that balances visibility and space constraints.
Touch screens allow direct interaction with menus. Resistive touch is cheaper, capacitive is more responsive. Determine if buttons are enough or if touch is needed for control. Touch adds functionality but increases complexity.
Select touch only if interaction is essential for your use case.
Good libraries and examples speed up development. Look for products with active community support. Detailed datasheets help with hardware setup. Without support, coding can take longer.
Check for available code examples before purchasing.
Build quality affects lifespan and performance. Look for robust modules with stable connections. Ratings from users provide insight into real-world reliability. Consider how the device will be used physically.
Opt for modules with positive reliability feedback.
Compare prices against features and quantity. Multi-packs offer better value for multiple projects. Budget options may lack advanced features. Balance your needs with your total budget.
Ensure the price matches the required features.
Start by verifying your pin connections match the module's requirements. Check that power and logic voltages are consistent. Use libraries provided by the manufacturer or community resources to initialize the display. Test basic characters to ensure communication is established.
Secure the module properly in your enclosure to prevent loose connections. Avoid bending the wires excessively, which can damage internal traces. Keep the screen clean from dust using a soft cloth. Do not apply excessive pressure on the panel.
Update your libraries to the latest versions for bug fixes. Monitor power draw to prevent battery drain in portable projects. If the display flickers, check for voltage stability. Regularly test functionality to ensure long-term reliability.
I2C is best for saving pins as it uses only two data lines for communication. This leaves more GPIO pins available for sensors or other components. If you need speed, SPI is a good alternative but uses more pins than I2C.
Some displays support both voltages directly, but others may require level shifters. Always check the specifications for logic voltage compatibility before connecting. Mismatched voltages can damage your board or the display module.
Use OLED modules which are self-luminous and consume less power than LCDs with backlights. You can also implement a sleep mode in your code to turn off the display when not in use. Reducing brightness also helps save energy.
This usually indicates a mismatch in I2C address or library settings. Verify that your code uses the correct address like 0x27 for character displays. Ensure the library is initialized correctly before sending data to the screen.
Capacitive touch is more responsive and works with light taps, while resistive requires more pressure. Capacitive panels offer better accuracy but are often more expensive. Choose based on your project needs and budget constraints.
It depends on the interface; I2C allows multiple devices if they have unique addresses. You may need multiplexers if addresses conflict. Check the module docs for supported device limits to avoid communication errors.
Yes, most modules are compatible with ESP32 and STM32 boards. Verify logic level compatibility to ensure they work correctly. Libraries often support these platforms to ease integration.
Use a soft, dry microfiber cloth to remove dust. Avoid chemical cleaners that might damage the surface coating. Do not apply liquid directly to the screen. Gentle wiping maintains visibility without harm.
We reviewed ten top options ranging from simple text modules to high-resolution touch screens. Each choice offers unique benefits depending on your project complexity and budget. The selections highlight reliability, ease of integration, and visual quality across the board.
Prioritize interface type and resolution based on your specific needs. I2C modules are great for simplicity, while SPI modules offer speed for graphics. Ensure your board supports the display type to avoid compatibility issues during setup.
Remember that product availability and terms may vary over time. Always check current listings for the latest details before purchasing. We hope this guide helps you select the perfect display to bring your Arduino projects to life.